
Having a concealment shelf as your primary gun locker for your everyday carry firearm is becoming increasingly popular. It’s a great way to store your gun safely while still ensuring fast access. In this article, we will cover everything you need to know to set up your gun concealment shelf. We’ll cover the tools you’ll need, as well as videos and images to help ensure that you set up your shelf properly.
Before we get into it, we’ll briefly explain what a gun concealment shelf is and why you may want one for your tactical wall. If you are already familiar with the basics of gun concealment home decor, feel free to skip down to the “tools needed” section to see the step-by-step guide for getting your shelf set up.

WHAT IS A CONCEALMENT SHELF AND WHY WOULD YOU NEED ONE?
So what is gun concealment home decor and why would you want it? Essentially, you can think of it as a gun locker that blends in seamlessly in your home. At Timber Vaults, we currently offer two types of tactical furniture, a gun safe shelf and a mirror gun safe. We offer these in multiple sizes to serve as a safe locking hiding place for small handguns up to larger carbines. In fact, they can even be used as an AR wall mount. Check out the video below to see our tactical walls in action and continue reading to see the details of what it takes to install your Timber Vaults hidden gun shelf.
TOOLS NEEDED
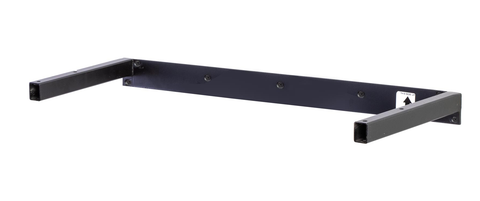
Unlike some of the hidden gun safes for sale, Timber Vaults gun concealment shelves uses a fully welded steel mounting bracket which is rated for up to 50 pounds per stud and will allow you to install your shelf in just a few minutes. To install, you will need the following items.
- Drill
- Drill bit
- Screwdriver or drill driver bits
- Level (strongly recommended)
- Stud finder (strongly recommended)
- Brand new set of AAA batteries
- Pencil
Step by Step Guide Concealment Shelf Installation
Prior to installing your new concealment shelf, ensure that all parts are complete, including electronic keys, locks, screws, brackets and undamaged shelf. If anything is missing, please don’t hesitate to reach out to us via email.
Step 1: To get started, decide where you will install your new Timber Vaults concealment shelf—in your home or office. Once the approximate location has been determined, use your stud finder to locate the stud. You must ensure that at least one of the screws goes through the mounting bracket and into the stud. Then using a drill, temporarily drill the mounting bracket to the stud.
Step 2: Using a level, move the bracket up and down to ensure that it is level in both directions. Once leveled, carefully mark on the wall where the remaining screws will be placed through the metal mounting bracket.
Step 3: Next step of installing your gun safe shelf is to temporarily remove the metal bracket and drill out the holes that you marked and insert the plastic wall anchors through the sheetrock. Once complete, reattach the hidden gun safe mounting bracket into the stud and anchors using the supplied screws. The bracket should fit snugly and level to the wall.
Step 4: With the help of someone else, carefully lift your gun concealment shelf onto the metal mounting bracket and slide it against the wall. Once flush with the wall, use the supplied screws to secure the mounting bracket to the shelf. Please note that not all walls are totally square. In the event your shelf points up or down ever so slightly, small shims or washers can be inserted between the top of the bracket and the shelf to ensure that it is totally level.
Step 5: The excitement is probably building for your new gun locker! Now, it’s time to set up the RFID gun lock. Install 4 brand new AAA batteries. Using one of your supplied key cards, swipe it above the electronic lock. You should hear a single beep followed by a quiet buzzing sound of the lock engaging. If your lock beeps multiple times, it is most likely that one or all of your batteries are not new, so you must replace them. 90% of time, customer’s contact us about this problem.

Step 6: Once you have confirmed that your lock is set up and fully powered. It is time to install the locking pin. This will screw into the lid of the concealment shelf using the two supplied screws. Before adding any contents to your gun concealment shelf, close the lid and confirm that it opens properly several times. Next up, you are ready to customize the provided foam and finally your new gun concealment decor is all set up!
To see a summary of these steps check out the video below!
DON'T FORGET TO ADD LIGHTS!
Wait! No tactical walls are complete without adding lights. About 50% of customers opt to add motion activated lighting to their hidden gun safe to ensure they can see their firearm at night. Take a look at the picture below to see what a gun safe shelf looks like with lighting and order yours using the button below!

CLOSING THOUGHTS
If you are looking for a gun locker for your tactical walls, you’ve come to the right place. Timber Vaults gun concealment home decor is the place to be. We are honored that you chose us as your trusted gun concealment solution. If you haven’t ordered already take a further look at our gun concealment furniture below.


